
The Ultimate Guide for Sharing Large Files Securely
Effectively Sending Large Files and Folders with Apple Technology and Web Services
The fortunate thing for all of us living in this modern world of technology is that we have a plethora of many great options for delivering a large file or folder of files to anyone, anywhere, at any time.

Moving Large Files from Point A to Point B
There are times when we have a large file that we need to share with family or friends, but cannot use something like a simple text message with Photos app media included as we normally would for smaller files. We may also want to ensure, in the case of an image or video file, that the original quality is preserved for the recipient.
The fortunate thing for all of us living in this modern world of technology is that we have a plethora of many great options for delivering a large file or folder of files to anyone, anywhere, at any time.
Of course the myriad of solutions to this problem can also create an abundance of confusion. This guide has been carefully crafted with this in mind, so that the next time you need to send along that gigantic file, you will know precisely the best way to do it.
It All Begins with a Zip
An excellent place to start when sharing large files across the web is by zipping the file and setting a password for added security.
There is a wonderful application that will allow you to do just that and it is called, Keka. It can be downloaded for free from GitHub on the releases page. Scroll down to the Assets section and click the Keka.dmg or the Keka.zip file to download the latest version to your computer. Open this file and drag Keka to your Applications folder. You can then drag Keka to the Doc or open it in the future with Spotlight (Command-Space bar). Keka can also be purchased from the App Store for $5 if you would like to support the developer.
The methods used in this guide, except for AirDrop sharing or using an iCloud Link with Photos app, describe the use of Keka for zipping and encrypting your files and folders before sharing. All of the other solutions cited below can send your files without being zipped and password protected, but it is still highly recommended to follow this protocol for the much better security and robust delivery benefits it offers.
As previously mentioned, Keka can be used not only to Zip a file or folder of files into one archive, but it can also be used to set a password for each zipped file you send, so that it is securely encrypted and can only be viewed by your intended recipient. This password should be shared with your recipient(s) through a secure channel. The best options are through an encrypted FaceTime audio or video call, or a secure iMessage sent from one Apple device to another. It could also be sent through an Apple Note shared between users who have Advanced Data Protection enabled. For cross-platform password sharing, a messaging app like Threema or Signal would be an excellent choice.
The Zipping Process:
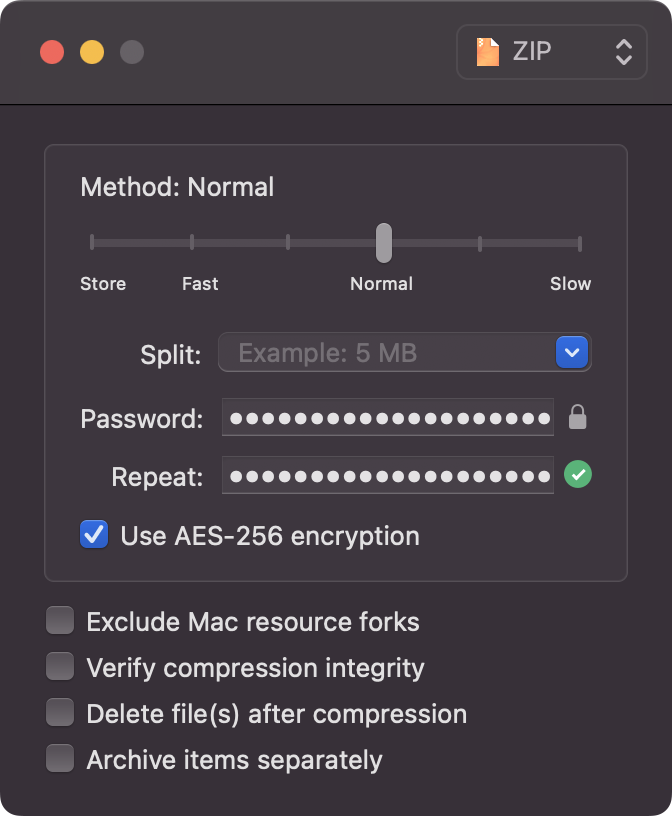
Choose ZIP from the file format popup
Insert your chosen Password: and confirm it in the Repeat: field
Select Use AES-256 encryption for best security
Select Exclude Mac resource forks if sharing with a non-Apple user
Drag and Drop your file or folder of files onto the Keka Window
Your Zip archive is now ready for sharing (it is found next to the original file or your custom destination within Keka Settings…/Compression)
The Best Sharing Options
Now that we know how to make a securely encrypted Zip archive (for those situations where it is needed), we are ready to use one of the services listed below that will provide a convenient and robust method for transferring our large files reliably to another user.
We will cover many options that are built right in to the Apple ecosystem and one at the end of this guide that is a cross-platform solution that exists as an excellent free or paid web service.
The services and apps used to share large files include: iCloud Mail Drop for large attachments over email, AirDrop for sharing files by instantly linking one Apple device to another, iCloud Link for quickly sharing a web link to any device, the multi-function Dropover app to upload and create a sharable link to a file, and finally Filemail, which is fully cross-platform and will work from any type of device for sending and receiving over the web.
It’s important to keep in mind that some of these options will only allow you to share files up to 5 GB in size. If you are sharing photos or videos above this limit, your best options are AirDrop, iCloud Link (with a premium iCloud subscription) or a paid Filemail account. These solutions will give you the ability to send original quality images and video files that are quite large.
We will now cover the best ways to share large files for every use case below.
Sharing with iCloud Mail Drop
Every Apple user with an Apple ID has access to a free iCloud account. This provides access to the included iCloud Mail service. Built in to Mail is the quite useful feature called Mail Drop, which is available to employ when an attachment is bigger than ≈ 20 MB. This allows you to send a file over email that is up to 5 GB in size and it will not count against your iCloud storage limits even if you only have a free 5 GB account. Best of all, everything happens seamlessly in the background. Simply attach your file (zipped and password encrypted is recommended) to your message and off it goes to the addressed contact(s).
The Process in Detail:
Make sure Send large attachments with Mail Drop is selected in Mail/Settings/Accounts for your iCloud email address:

Compose a new mail message with your file attached
Address your message to the desired contact(s) and include a Subject
Click the Send message button
Your recipient will receive something similar to the image below in their Mail app:
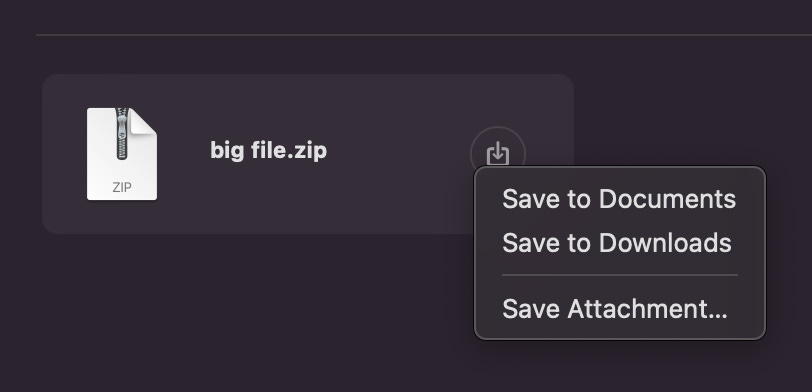
Clicking on the Download button will give the receiver several options to save the file to their device
Your contact can now access the file you sent with Mail Drop!
Sharing with AirDrop
What if, you recorded a longer video from an event and the file is too large to send with Messages to your friend. If you are in the same vicinity as your intended recipient, you can use the elegant method of sharing over AirDrop, which can also preserve the original recording quality of your content. AirDrop does this by creating an ad-hoc wireless network between local users that allows them to transfer large files simply and efficiently.
Here’s How It Works:
Turn on AirDrop from Settings/General/AirDrop & Handoff for Mac and Settings/General/AirDrop for iPhone
The devices should be configured under AirDrop settings for Contacts Only for better security
Use Cellular Data should be turned on if out of Wi-Fi range (beware data costs)
Turn on Bringing Devices Together if you want to use Tap to Share
Bluetooth and Wi-Fi must be turned on for both devices
Get within the same proximity as your intended recipient
Select your Photo(s) or Video(s) and tap the Share button
Select the Options button to choose your desired file format:
- Leave the file format set to Automatic if you want your iPhone to determine the best format for the destination or choose Current to preserve original format.
- Turn on All Photos Data if you want to send original quality files with all meta data preserved, or turn it off if you want to strip out all meta data, including location data, for greater privacy (This setting is only available for iCloud Link and AirDrop sharing).
Tap the AirDrop icon under the file(s) preview with the desired contact
With Tap to Share enabled on both devices you can touch one iPhone to another for instant transfer of the selected files
The AirDrop file transfer is now complete!
Sharing with iCloud Link
When you are not currently in the same vicinity of the person you are sharing with, sending an iCloud Link from your iPhone and the Photos app is another great way to make a photo or video available to others. It should be noted, however, that Photos must be turned on in iCloud settings for this option to be available. Those who have chosen not to use iCloud Photos, due to the higher yearly service tier fees required for greater cloud storage, will not find this method as useful as the others listed in this guide. It’s also good to keep in mind that Shared iCloud Link files will be available for 30 days at which point they will be automatically deleted from iCloud servers.
The Process Works as Follows:
Select your Photo(s) or Video(s), tap the Share button and then Options
Turn off the location data button if you are using that feature on-device and don’t want to share this data with others
Leave the file format set to Automatic if you want your iPhone to determine the best format for the destination or choose Current to preserve original format
Turn on All Photos Data if you want to send original quality files with all meta data preserved, or turn it off if you want to strip out all meta data, including location data, for greater privacy (This setting is only available for iCloud Link and AirDrop sharing)
Tap Done
Scroll down in the Actions list and tap Copy iCloud Link
A message will pop up informing you that your selected media is being prepared for sharing
Once this is finished the iCloud Link is automatically copied to your clipboard
Open Messages, Mail or another messaging app, create a message and paste the iCloud Link to the image or video files and send to your recipient
Your contact now has access to download the files through an iCloud Link!
Sharing with Dropover
Dropover is a powerful Mac app that enhances the finder by providing a temporary holding shelf for files, folders and even web images and URLs that you can then perform any number of actions on at your leisure. One of these very useful actions is the ability to create a web link for your file(s) to share with anyone. Dropover can use your available iCloud Drive storage, its own built-in Cloud server (up to 5 GB per upload), AWS S3 and several others. Dropover can also zip and password protect your files, but we’ve already covered that process using Keka.
The Dropover Share Action:
Shake your cursor while holding down the Left-click button of your mouse or trackpad on your zipped file (can also drag file with modifier key - Shift)
Release your file in the Dropover shelf which appears
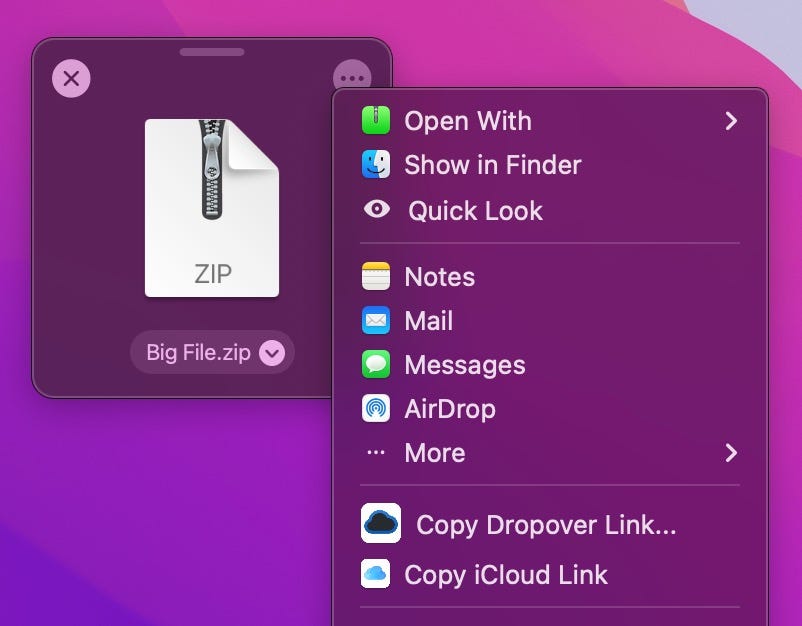
Click the Action button (3 dots) for the item in Dropover

Image of Dropover Shelf Action Menu Choose Copy Dropover Link… or Copy iCloud Link (keep in mind that this second method uses your available iCloud Drive storage space)
Wait for the upload to finish and then paste the copied link from your clipboard to your messaging app of choice and send it off
You can also see your current list of shared items and copy the shared link again in Recent Uploads from the Dropbar menu bar item
Your contact will now have a download file link from Dropover!
Sharing with Filemail
The beauty of Filemail is its ease of use and the fact that like many of the other options covered, it is free for files up to 5 GB in size. They also have paid plans starting at $12/month for sharing files up to 250 GB in size and $18/month for sharing files of unlimited size. It is also entirely cross-platform and would be a suitable solution for Apple users needing to send files to non-Apple users. The other great thing is that it is extremely fast to upload your files to their servers and they secure your transfers with end-to-end encryption. Since you can’t include a password with the free service, it is important to make sure you have included one for your zipped file with Keka (as described above).
Sharing a Filemail Web Link:
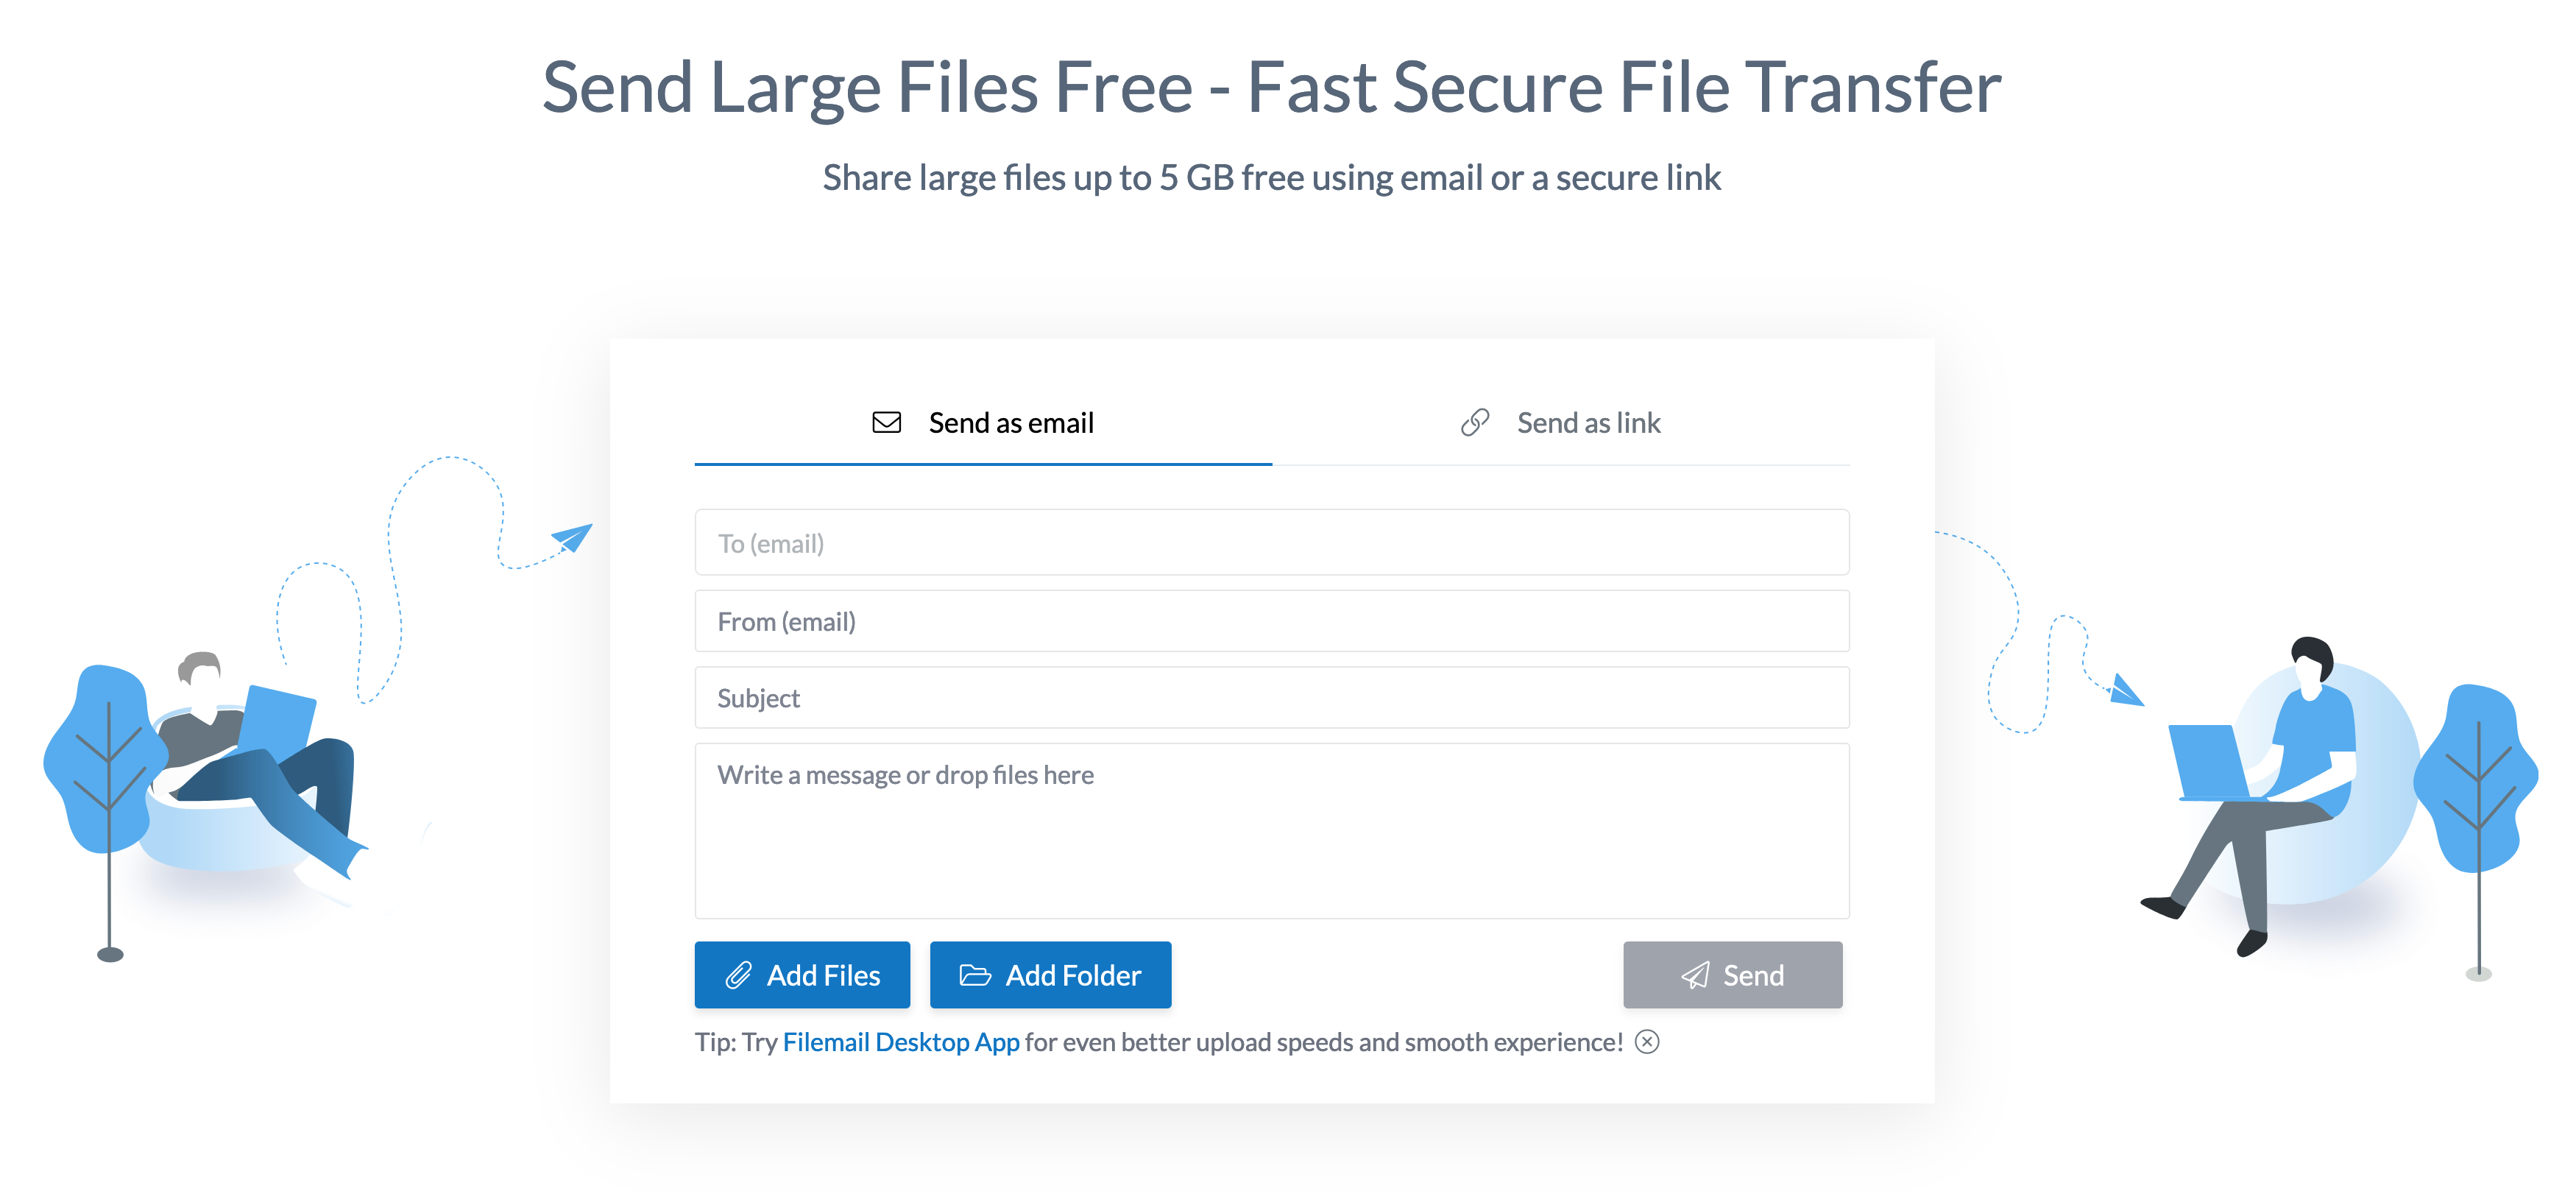
Start by going to their website: https://www.filemail.com/
Click Send as link from the sharing window
Type a message to be displayed on the download page (if desired)
Click the Add Files button and choose your file to upload
Click the Send button
Choose the File availability duration (either 1 day or 1 week for the free service)
Click the Send button again and wait for uploading to complete
Click the Copy to clipboard button or the File link itself to capture the download link to your clipboard for sharing
Paste the File sharing link in your desired communication app, e.g. Mail or Messages and send your zipped file on its way!
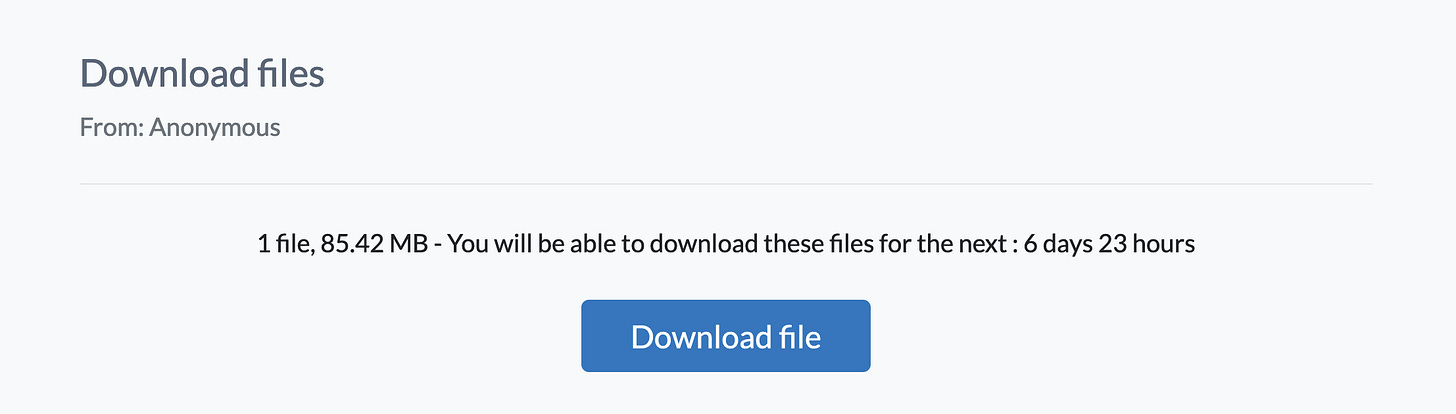
Your recipient will see a convenient page to download the file in their web browser:
You Are Now a Large File Sharing ExpertI hope you have discovered some valuable and effective techniques for sending large files securely over the web with your Apple devices. Next time, a friend or family member will be asking you how they can send a folder of photos or long video from their latest event.

Please post in the comments section if you find any of these specific file sharing options useful, or if you have used other methods in the past that have worked well for sending big files. It would be great to hear from your experience.
Helpful References:
Share photos and videos on iPhone
https://support.apple.com/guide/iphone/share-photos-and-videos-iphf28f17237/ios
Easier Drag and Drop on your Mac.
https://dropoverapp.com/
Keka, the macOS file archiver
https://www.keka.io/en/
Mail Drop limits - Apple Support
https://support.apple.com/en-us/108329
Add an email attachment in Mail on iCloud.com
https://support.apple.com/guide/icloud/add-an-attachment-mm6b1a7a10/icloud
iCloud Essential Training Online Class | LinkedIn Learning, formerly Lynda.com
https://www.linkedin.com/learning/icloud-essential-training-19869256/
How to quickly share iPhone photos with a link
https://www.idownloadblog.com/2018/07/05/howto-icloud-photos-sharing/